Navigating a scorching summer without a fully functional air conditioner can be challenging.
Your GE air conditioner remote is vital to maintaining a comfortable indoor temperature.
However, the remote’s battery may exhaust its power over time, leading to sluggish response or complete non-functionality.
As such, knowing how to change the battery in your GE air conditioner remote becomes a fundamental skill.
How to Change Battery in Ge Air Conditioner Remote?
This guide will walk you through the straightforward process, ensuring you’re never left at the mercy of an uncooperative remote.
Whether you’re a seasoned DIY enthusiast or picking up a screwdriver for the first time, this simple operation is something you can easily handle.
Key Points
- Identify the Battery Compartment: Locate the battery compartment on your remote.
- Open the Battery Compartment: Carefully open the battery compartment.
- Remove the Old Battery: Take out the exhausted battery from the compartment.
- Insert the New Battery: Place the new battery into the compartment, ensuring correct orientation.
- Close the Battery Compartment: Securely close the compartment after replacing the battery.
How To Change Battery In Ge Air Conditioner Remote?
Changing the battery in your GE air conditioner remote is a simple task that requires minimal tools and time. Here’s how you can accomplish it in a few quick steps.
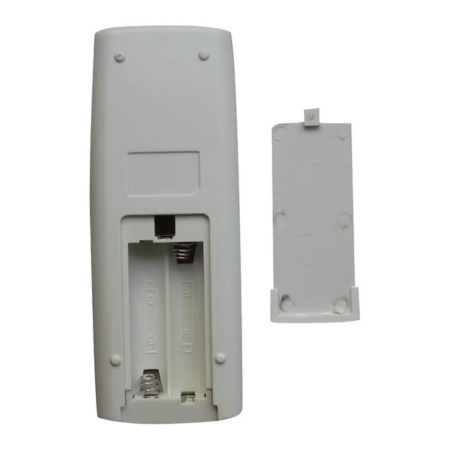
Step 1: Locate the Battery Compartment
The battery compartment is often found on the back of the GE air conditioner remote.
Look for a small, rectangular section on the remote’s back.
An indent or a different texture typically delineates this section.
It will have a small arrow or indentation, indicating where to open it.
It may also be marked with the word ‘Battery’ or an icon of a battery.
Identifying the battery compartment is the first step.
Ensure you have found the right section before proceeding.
Do not force open any other part of the remote.
If you’re unsure, consult the user manual.
The manual typically contains diagrams showing the remote’s different parts.
Your remote may look slightly different depending on the model.
However, the battery compartment is almost always located at the back.
You’re ready for the next step once you’ve located the battery compartment.
Remember to handle the remote gently to avoid any damage.
Step 2: Open the Battery Compartment
Opening the battery compartment is simple.
Locate the small arrow or indentation.
This marks the spot where you can open the compartment.
Gently push or slide in the direction of the arrow.
The cover should easily come off.
Avoid using excessive force.
The compartment’s construction is often light plastic.
Being too forceful may cause damage.
If the cover doesn’t move easily, stop and check again.
Ensure you are pushing or sliding in the correct direction. Recheck the arrow or indentation.
It’s crucial to apply gentle pressure only. If the cover still doesn’t move, consult the user manual.
The manual may contain specific instructions for your model.
After you remove the cover, set it aside.
Place it on a clean, flat surface. Ensure it’s somewhere safe where it won’t get lost or stepped on.
You’re now ready to move on to the next step. Remember, patience and care are crucial.
Damaging the cover or compartment may affect remote functionality.
Proceed with the next steps only after the battery compartment is safely open.
The process should be smooth, not forced.
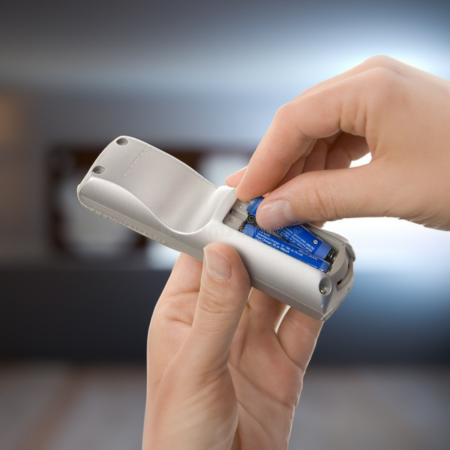
Step 3: Remove the Old Batteries
To remove the old batteries, you need to be gentle.
Hold the remote upside down.
This prevents damage to the battery contacts.
Let the batteries fall out naturally. Avoid shaking or tapping the remote.
If the batteries don’t fall out, don’t worry. You can gently pry them out.
Use a small, non-metallic object. A plastic spoon handle can work.
Avoid using anything sharp or metallic.
This could damage the battery compartment.
Slide the object under the battery edge. Gently lift the battery out.
Do this one battery at a time. Avoid touching the battery ends.
This is important for safety reasons.
Once you remove the batteries, dispose of them properly.
Do not throw them in regular trash.
Batteries contain chemicals that are harmful to the environment.
Consider battery recycling programs. Look for them in your local area. Your local electronics store might have one.
With the old batteries removed, you’re ready for the next step.
Remember to always handle the remote and batteries with care.
Step 4: Insert New Batteries
Ensure you have the correct new batteries. Check the remote’s battery specification.
Purchase batteries that match these specifications.
Take hold of your new batteries. Align them correctly.
Note the positive and negative sides of the batteries.
Also, observe the layout inside the battery compartment.
This will guide you on how to insert the batteries. Place the first battery into the compartment.
The positive side should align with the positive marking in the compartment.
Do the same with the second battery if needed.
Make sure that both batteries fit securely.
They should not rattle or move around in the compartment.
Once inserted, check the remote’s functionality. Press a few buttons on the remote.
The device it controls should respond accordingly.
If it does not, double-check the battery alignment. You may have inserted them incorrectly.
Correct it if necessary and try again.
If it still does not work, you may need to consult the manufacturer’s guide or seek professional assistance.
Remember, patience is key while dealing with electronic devices.
You have now successfully replaced the batteries in your remote.
Step 5: Close the Battery Compartment
Take the remote. Locate the battery compartment cover. Hold it firmly.
Match the cover to the compartment.
Ensure it aligns correctly with the compartment’s edges. Press down gently.
You should hear a click. This indicates the cover is in place.
Ensure the cover is secure. It should not move around.
It should not come off easily. If it does, re-align and try again.
Successful alignment means a well-closed compartment.
Check the remote again. Use it to control your device.
All buttons should work as expected.
The device it controls should respond.
If it does not, check the manual. Or seek professional help. Never force the cover. Forcing can lead to damage.
Remember, always handle with care. You have now replaced the remote batteries and closed the compartment. Well done on this task.
You’re ready to use your remote once again. Enjoy your uninterrupted device control.
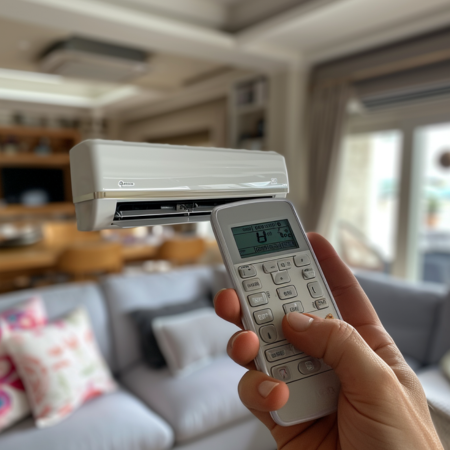
Step 6: Test the Remote
Turning on your device. Point the remote towards the device.
Press the power button on the remote. The device should respond.
To test further, try other buttons. Check if the volume buttons work.
Try changing channels or inputs.
The device should respond to all commands. If not, check the batteries.
Ensure they are properly placed.
Remember, the positive and negative ends should match. Try the remote again.
If it still doesn’t work, check the remote sensor.
It should be free from dust and obstructions. For infra-red remotes, ensure line of sight.
If all fails, consult the manufacturer’s guide. You may need professional assistance.
With patience and care, you can solve most issues.
Testing the remote ensures it’s fully functional.
Congratulations! Your remote is ready to use.
Frequently Asked Questions
FAQ 1: What should I do if my remote doesn’t work after replacing the batteries?
If your remote is still not functioning correctly after changing the batteries, ensure they are correctly placed with the positive and negative ends matching. If the issue persists, the remote sensor might need cleaning, or the device’s infrared line of sight could be obstructed. Consult the manufacturer’s guide for more help, or seek professional assistance.
FAQ 2: What does it mean if the remote cover comes off easily?
If the remote cover comes off easily, it might be incorrectly aligned or securely fastened. Try to re-align it and secure it again. If the problem continues, you might need to replace the cover or the entire remote as the cover plays a vital role in protecting the remote’s internal components.
After replacing the batteries and securing the cover, you should test your remote by pressing the power button first. If your device responds, proceed to test other buttons like volume controls, channel switches, and input changes.
FAQ 4: Can I force the cover closed if it isn’t fitting properly?
Forcing the cover could potentially damage the remote. If the cover is not fitting properly, it’s recommended to re-align it and try again. If it still doesn’t fit, consult the manufacturer’s guidelines.
FAQ 5: What if the device does not respond despite the remote working?
If your device isn’t responding to a functioning remote, there could be an issue with the device itself. Check the device’s sensor, ensure it’s free from dust or obstructions, and ensure there’s a clear line of sight for infrared remotes. If the issue persists, contact the device manufacturer or seek professional assistance.
FAQ 6: When should I seek professional help?
While most issues with a remote can be fixed at home with patience and care, you should seek professional help if the problem persists despite all your attempts to fix it. Examples could include the remote not working after battery replacement, the device not responding, or the remote cover not fitting properly.
Conclusion
Maintaining your remote control is essential.
Regularly replace batteries. Check the cover fits correctly. Don’t force it to close.
Test the power button first. Proceed to other buttons.
Check the device’s sensor. Ensure clear line of sight.
If all else fails, seek professional help. Taking care of your remote can extend its lifespan.
Remember, patience and attention to detail are key.

- GE Profile Microwave Troubleshooting 4 Common Issues - September 3, 2024
- How to Microwave Toaster Strudel at Home - September 2, 2024
- How to Improve Microwave Exhaust Fan Efficiency? - September 1, 2024