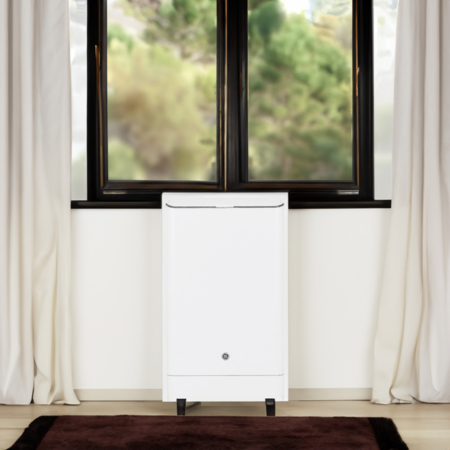
In the era of smart home devices, your air conditioner can be more than just a means to beat the heat.
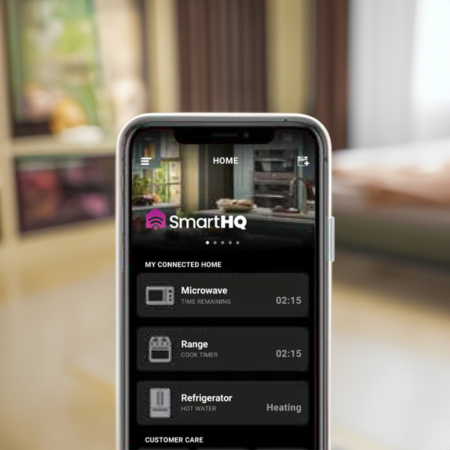
When connected to Wi-Fi, your GE air conditioner can offer advanced features like remote control via smartphone apps, energy usage monitoring, and seamless integration with other smart devices.
This guide will provide a step-by-step process for connecting your GE air conditioner to Wi-Fi.
Whether you’re tech-savvy or a newcomer to smart home technology, this guide will explain how to connect GE air conditioner to Wifi.
Let’s transform your cooling experience with the power of connectivity!
Key Points
- Ensure your GE air conditioner supports Wi-Fi connectivity.
- Download and install the GE Appliances Comfort app.
- Connect your smartphone and air conditioner to home Wi-Fi.
- Follow in-app instructions to complete the AC’s Wi-Fi setup.
How To Connect Ge Air Conditioner To Wifi?
It’s time to embrace technology and elevate your home’s comfort level. Connecting your GE air conditioner to Wi-Fi is simple. Follow the steps below to get started.
Step 1: Download the GE Comfort App
The first step in this process is downloading the GE Comfort App. This application will allow you to control your air conditioner remotely.
It’s available on both iOS and Android platforms. So, whether you have an iPhone or an Android phone, you can use this app.
To download it, go to your device’s app store. This would be the Apple App Store for iOS users and the Google Play Store for Android users.
Once you’re in the app store, search for “GE Comfort App.” You should see it pop up in the search results.
Click on the GE Comfort App in the search results. This will take you to the app’s page.
On the app’s page, you’ll see a button that says “Install” or “Get.” Click on this button to download the app.
The download should only take a couple of minutes. However, this depends on your internet speed.
You’ll see the GE Comfort App on your device’s home screen when the download is complete.
Congratulations! You’ve taken the first step in connecting your GE air conditioner to Wi-Fi.
Step 2: Open the App and Select ‘Add Appliance’
Once you have the GE Comfort App on your device, it’s time to open it.
On opening the app, you’ll see a user-friendly interface.
You must create an account if this is your first time using the app.
To do this, click on the ‘Sign up’ button. Follow the prompts to create your account.
If you already have an account, click ‘Login.’
After logging in, you will be on the main screen. This is where you control your appliances.
Look for the ‘+ Add Appliance’ button on the main screen. This is usually at the top right corner of the screen.
Click on the ‘+ Add Appliance’ button. This will lead you to a new screen.
On this screen, you will see a list of appliances.
Scroll down the list until you see ‘Air Conditioner’.
Click on ‘Air Conditioner’. This will open a setup wizard.
The setup wizard will guide you through the rest of the process.
Follow the prompts, and you’re on your way to a smarter, more connected cooling experience.
Step 3: Choose ‘Air Conditioner’ from the List
Now that you have the setup wizard open, you will see a list of appliances. You need to select the ‘Air Conditioner’ from the list.
Don’t worry, it’s easy to spot.
The list is organized alphabetically.
Therefore, ‘Air Conditioner’ is at the top of the list.
When you find ‘Air Conditioner’, tap on it.
This will start the process of linking your air conditioner to the app.
The wizard will guide you through the rest of the process.
It’s designed to be easy to follow.
Just follow the on-screen instructions.
These instructions are pretty straightforward.
The app will ask for your model number.
This is to ensure compatibility between the app and your air conditioner.
You can find the model number on your air conditioner unit.
Once you’ve entered the model number, tap ‘Next’.
The app will then ask for your Wi-Fi details.
Enter your Wi-Fi network and password.
This will allow the app to connect your air conditioner to your Wi-Fi network.
Once you’ve done this, tap ‘Next’.
The app will then connect your air conditioner to your Wi-Fi network.
You’re now one step closer to a smarter, more connected cooling experience.
Well done! You’ve successfully chosen ‘Air Conditioner’ from the list.
Step 4: Follow the On-Screen Instructions
Now, let’s proceed to step 4.
Your screen will display a set of instructions. Pay close attention.
These instructions are crucial for setup.
Follow each instruction carefully. The app will guide you through the process.
It’s designed to be user-friendly.
Don’t rush – take your time. Each step is straightforward.
If you’re unsure, read the step again.
The app will ask for further information.
This may include your preferred settings. Enter these details as prompted.
These settings can be changed later.
Don’t worry if you’re not sure what to choose. Just select what seems best for now.
Once you’ve completed this step, tap ‘Next’.
Step 5: Connect your Phone to the Air Conditioner’s WiFi Network
In the next step, you’ll need to connect your smartphone to the air conditioner’s own Wi-Fi network.
Start by going to your phone’s Wi-Fi settings.
You’ll find a new network available.
This network is broadcast by your air conditioner.
It usually has a name similar to the model number.
Select this network.
You may be asked for a password.
The app will provide this password.
It’s unique to your air conditioner. Enter the password. Then, tap ‘Connect’.
Your phone will now connect to the air conditioner’s Wi-Fi. This might take a moment.
Please be patient. Once connected, return to the appTap ‘Next’.
The app will now finalize the connection.
It will join your air conditioner to your home Wi-Fi network.
This allows the app to control the air conditioner remotely.
Once this process is completed, you’ll see a confirmation message. Congratulations!
Your air conditioner is now connected to your phone.
You’re all set to enjoy a smart cooling experience.
Remember, you can always change your settings later on.
Take your time to explore the app and its features.
Step 6: Return to the App and Complete the Setup
Now that your phone is connected to the air conditioner’s Wi-Fi, it’s time to finalize the setup.
Return to the app. Tap ‘Next’.
The app will now check the connections. This may take a few seconds.
You’ll see a progress indicator.
When the process is complete, a ‘Setup Complete’ message appears.
Your air conditioner is now linked with the app.
This means you can control it remotely.
Explore the app to learn about its features.
Congratulations on setting up your smart air conditioner!
Step 7: Confirm Successful Connection
To confirm a successful connection, open your app. There should be an icon or name denoting your air conditioner.
If it’s there, the connection is successful.
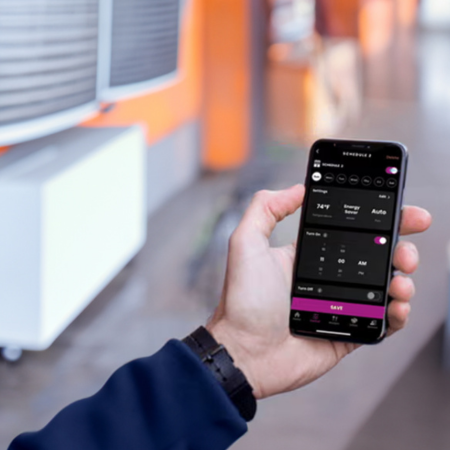
Test it. Try changing the temperature. Does it work?
If yes, you’re now in control of your air conditioner remotely. Great job!
If not, don’t worry. Check your Wi-Fi connection and retry the steps.
If the problem persists, contact customer service.
Enjoy your smart cooling experience.
Remember, the more you use the app, the more familiar you’ll become with its features. Happy cooling!
Frequently Asked Questions
FAQ 1: Why can’t I see my air conditioner in the app?
If you can’t see your air conditioner in the app, ensure you’ve successfully established the Wi-Fi connection between your device and the air conditioner. If the problem persists, check your internet connection, restart your router, and try the setup steps again.
FAQ 2: How do I change the temperature through the app?
To change the temperature, open the app and look for your air conditioner’s icon or name. Click on it to see various controls, including a temperature adjustment feature. Simply swipe or tap to adjust the temperature to your desired level.
FAQ 3: What should I do if the app isn’t responding?
First, try closing and reopening the app. If this doesn’t solve the problem, check for any updates in your device’s app store. If the app is still not working after updating, delete and reinstall it. If none of these steps solve your problem, don’t hesitate to get in touch with customer service.
Conclusion
In conclusion, setting up your smart air conditioner is a straightforward task.
You’ve successfully connected it to your phone.
The important thing is to test it.
Make sure it responds to temperature changes.
If not, check your Wi-Fi connection.
Retry the steps if needed.
Customer service is there to help too.
Over time, you’ll get used to the app features.
You’ve now unlocked a convenient way to control your cooling.
There’s no need to get up to adjust the air conditioner anymore.
Enjoy your smart cooling experience.
Well done on completing the setup!

- GE Profile Microwave Troubleshooting 4 Common Issues - September 3, 2024
- How to Microwave Toaster Strudel at Home - September 2, 2024
- How to Improve Microwave Exhaust Fan Efficiency? - September 1, 2024