Replacing a ducted RV air conditioner may seem daunting, but with a little preparation and the right tools, it’s a job you can handle yourself.

This guide will walk you through the step-by-step process of removing your old air conditioning unit and installing a new one in your RV.
Whether your current unit has stopped working or you want to upgrade to a more efficient model, this guide will help you do the job with minimal hassle.
So, let’s dive into how to replace a ducted RV air conditioner.
Key Points
- Gather necessary tools: Screwdriver, wrenches, wire cutters, and sealant.
- Safely disconnect and remove the old RV air conditioner.
- Clean and prepare the rooftop area for new installation.
- Position and secure the new air conditioner unit properly.
- Connect wires, test the new unit and seal edges.
How To Replace A Ducted RV Air Conditioner?
Before you start, ensure you have the right tools and a new RV air conditioner. Safety should be your top priority when following these steps.
Step 1: Disconnect Power Supply
First and foremost, disconnect the power supply. This is a critical safety measure that cannot be overlooked. The air conditioner is an electrical device; working on it while it’s connected to power can be hazardous.
Find the breaker box in your RV. The box is usually located in a storage area or under a bed. Once located, open it.
Inside the breaker box, you’ll see several switches. Look for the one labeled ‘Air Conditioner’. The labeling might differ in some RV models, but it’s usually easy to identify.
Once you find the air conditioner switch, flip it to the ‘Off’ position. This action disconnects the power supply to the air conditioner.
After flipping the switch, double-check to ensure the power is off. Try turning on the air conditioner. If it doesn’t come on, you’ve successfully disconnected the power.
Remember, safety first. Never skip this crucial step when replacing your RV air conditioner.
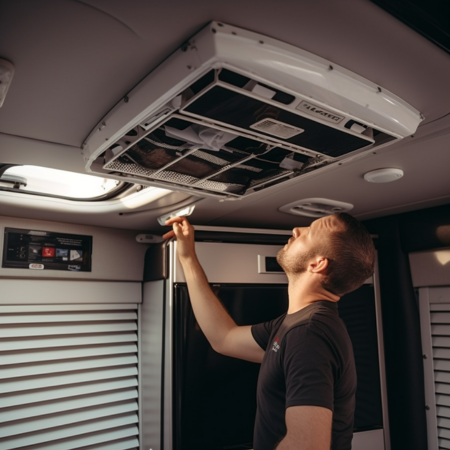
Step 2: Remove the Existing Air Conditioner
Begin by accessing the air conditioner from the rooftop of your RV. You may need a ladder for this.
Ensure the ladder is stable before climbing.
Once you’re on the roof, you will see the air conditioner unit.
The unit is usually enclosed in a metal or plastic cover. You’ll need to remove this cover.
There will be screws holding the cover in place. Use a screwdriver to remove these screws.
Keep the screws in a safe place. You don’t want to lose them. With the screws removed, you can now lift the cover off.
Under the cover, you’ll find the air conditioner itself.
The air conditioner will also be secured with screws. Again, use your screwdriver to remove these screws.
As before, keep these screws safe too.
With these screws removed, you can now carefully lift the air conditioner out. This can be heavy, so you may need assistance.
Be careful not to damage the roof of your RV during this process.
That’s it. You’ve successfully removed the existing air conditioner. Now, you’re ready for the next step.
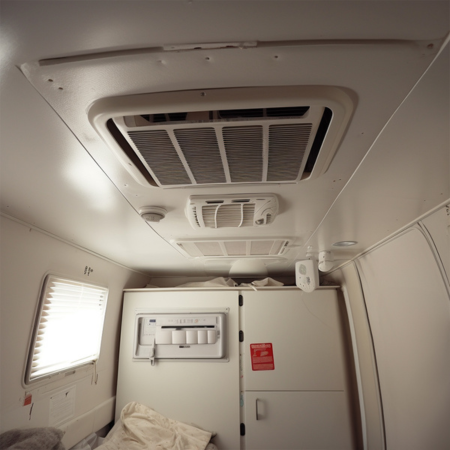
Step 3: Prepare the Installation Area
After removing the old air conditioner, clean up the area.
Use a broom to sweep off any debris. Inspect the area for damage.
Look for cracks or holes in the roof. These need to be repaired before installation.
Use a sealant suitable for RV roofs for this.
Apply it to the damaged areas. Wait for the sealant to dry. The drying time may vary.
Follow the manufacturer’s instructions. Once dry, check the gasket.
This is a rubber seal on the air conditioner’s base.
It prevents water from getting inside your RV. If the gasket is old or damaged, replace it.
New air conditioners usually come with a gasket.
If not, buy one that suits your model. Place the new gasket on the air conditioner’s base.
Ensure it’s properly aligned. Now, the installation area is ready.
You’re all set for the next step. This involves installing the new air conditioner.
Proceed with caution to ensure a successful installation.
Step 4: Install the New Air Conditioner
Start by lifting the new air conditioner unit. You may need assistance due to the weight.
Place it carefully over the installation hole. Ensure the unit fits perfectly.
Next, secure the air conditioner. There should be screws for this purpose.
Using your screwdriver, fasten these screws. Don’t over-tighten them.
Check the alignment of the air conditioner. Make sure it’s perfectly leveled.
An uneven unit can cause problems. Now, go inside your RV.
There should be a metal bracket. It’s included with the new unit. Secure this bracket from the inside of your RV.
The bracket ensures internal stability.
It fastens the interior and exterior parts of the unit.
Next, connect the electrical wiring. Make sure to match the color codes.
Incorrect wiring can lead to malfunctions. Once the wires are connected, secure them.
Use the provided wire nuts for this. Finally, attach the air conditioner’s cover.
This should easily fit over the unit. Now, you have successfully installed the new air conditioner. It’s time to test it.
Switch on the power and enjoy the cool air. Remember, safety is paramount during installation.
Use protective gear and take your time.
Step 5: Connect the Ducted System
Start by identifying the ducted system’s connection area. It’s usually on the side of the unit. Ensure it’s clean. Dirt or debris can hinder a secure connection.
Next, take your ducting hose. The hose should come with your new air conditioner. It’s flexible and designed for secure attachment. Position it on the connection point.
Now, push the hose onto the connection area. Apply a little force, but be careful. You want a tight fit. But you don’t want to damage the ducting or the unit.
With the hose in place, secure it. There should be a clamp included. The clamp ensures the hose stays attached. Position the clamp over the hose and tighten. Confirm it’s secure.
Finally, connect the other end of the hose. This end connects to your RV’s ducted system. Repeat the same process. Ensure a secure connection. Your ducted system is now connected.
Check for any air leaks. Any gaps can affect the efficiency of the system. If all looks good, your new air conditioner is ready.
Remember, always refer to your unit’s manual. Every model is unique. Following specific instructions ensures a proper installation.
Step 6: Connect the Power Supply
Locate your RV’s power supply. You’ll connect the air conditioner to this.
Start by checking the power supply’s interface. It should be clean. Dirt can cause connection issues.
Now, get the power cable for the air conditioner. It should come with your new unit.
Look for any signs of damage. Frayed wires or loose plugs can be dangerous.
Next, plug the power cable into your RV’s power supply. Ensure it’s a secure fit. It should not be loose.
Now, switch on the power supply. But be careful. Always maintain safety procedures.
Check the unit. It should start operating. If not, recheck your connections.
Upon startup, observe the unit. Check for any unusual sounds or smells. If all seems normal, your power connection is successful.
Lastly, never forget to consult your manual. Different models may have unique power connection steps. Following them is crucial for safe operation.
Step 7: Test the New Air Conditioner
Now, it’s time to test your new air conditioner.
Start by turning on the unit. Use the control panel or remote. Every model has a unique interface.
Listen closely. The sound should be consistent. It should not fluctuate.
Feel the air. It should cool down within a few minutes. If not, there may be an issue.
Check the vents. The airflow should be smooth. There shouldn’t be any obstruction.
Next, try the different modes. Every air conditioner has at least two. Typically, they are cooling and fan mode. Ensure both work well.
Then, adjust the temperature. The unit should respond quickly. There shouldn’t be any delay.
Also, check the timer function. It’s a basic feature in most models. Set a specific time. The unit should shut off when it reaches that time.
Lastly, check the energy consumption. Some models have an energy-saving mode. Make sure it’s functioning.
Remember, always refer to your manual. It can offer troubleshooting tips. If the unit doesn’t function as expected, consult the manual.
If everything checks out, congratulations! Your air conditioner installation is successful. Now, you can enjoy a cool and comfortable RV journey.
Conclusion
Installing an air conditioner in your RV is an achievable task. It requires patience and precision. It can dramatically improve your comfort during travels.
Remember, safety is paramount. Always turn off the power before starting. Check your connections carefully.
With the right tools, the process becomes easier. Always refer to your manual. It’s your best guide for installation.
The testing phase is critical. Ensure all functions work properly. Don’t overlook the energy-saving mode.
In the end, your efforts pay off in a cool and comfortable RV journey. Enjoy your newly installed air conditioner. It’s your gateway to comfort on the road.

- GE Profile Microwave Troubleshooting 4 Common Issues - September 3, 2024
- How to Microwave Toaster Strudel at Home - September 2, 2024
- How to Improve Microwave Exhaust Fan Efficiency? - September 1, 2024